MOVEMENT by Jenna Sefkow
- Angie Warmington

- Jul 12, 2020
- 8 min read
My name is Jenna Sefkow (Snapberry Photographs over on Instagram) and I am so thrilled to be here teaching this p52clicks lesson on movement! I have been a photographer for nearly 11 years, focusing mainly on families as of late as well as documenting our own adventures. I have three kiddos who are nearing the ages of 11, 9, and 7 and they have pretty much become experts in helping me make a little magic with movement! Sometimes they are the ones that come up with the fresh ideas to try! Movement for me is so inspiring and I love trying out somewhat crazy or unconventional ideas in the hopes of creating that one of a kind, unique shot. Sure, we do lots of twirls and jumps and running around here, but my favorite images are always the ones that began with “Hey, let’s try this!” and we give it a few or a few one hundred attempts trying to get it right. In the meantime, the kids are having a good time and are always excited to see the final shot.
My biggest advice for photographing movement is to try and think outside of the box. Go beyond simply asking yourself “How can I capture my child jumping/running/etc?” Instead, think about how the movement itself can enhance the image. I use movement in all sorts of ways beyond a jump or a twirl that I will teach you all about today. You’ll see that I spend a lot of time focusing on the movement of things other than my subject!
Use movement to draw your eye to the subject or frame your subject.
I have a few favorite scarves that I’ve used to draw the viewer’s eye to my subject. If you are familiar with my work, you might recognize the rainbow and flag scarves since I’ve used them a time or two! They are an inexpensive little prop and easy to collect in various colors or patterns. See what happens below when I play with the movement of the scarf!

For the shot above, my daughter held one side of the scarf on her shoulder while I held the other end in my left hand. As I shot, I made it ripple, swishing it back and forth. The result is the lines of the scarf, stopped in their movement, drawing our eyes right to my daughter’s smiling face. In the photo below, my kids had their own idea for tossing it up in the air and huddling underneath it as it came down.


In this rainbow shot above, I had two special assistants holding each side of the scarf (my other two kiddos). On the count of 3, I had them toss their arms up (without letting go of the scarf), and then gently let it fall on its own. We shot until I caught that perfect arched rainbow shape over my daughter’s body. Also in this shot, you can see I had my daughter grabbing onto her scarf. We call this move a “swish”! I use it all the time when they are wearing skirts or dresses to catch just a little extra movement so they aren’t just simply standing still in the frame.

In this shot, you can see I was experimenting with angles as I shot from below her to capture all the colors of the rainbow scarf across the frame.
Use movement to add artistic effects
What can the movement of the objects and things around your main subject do for your storytelling?

On the night the above shot was taken, I had been shooting my kids for a few minutes on their new slip and slide. At first, I was aiming for that perfect ending slide shot. I got a few keepers and I was ready to pack it up right away. That was, until my daughter accidentally jumped on the side of it and the water shot up 3x higher! I knew it was going to look so pretty in the light behind her, so we jumped and jumped and jumped. Here, I was more concerned with capturing the movement of the water than I was with capturing the perfect jump from her! The result of studying the movement around her not only added the sparkly water bokeh, but framed her in the middle of my shot as well!

From the same night, after we had been jumping on the slip and slide, I got a little worried we would rip a hole in it (sometimes anxiety gets the best of me!). The light was still perfect but the slip and slide was not quite at the right angle, so we kicked the water into the light instead. While I captured a great action shot of her kicking, it was the actual movement of kicking that added the extra water sparkle I was after.

Here’s an example of the original shot I was attempting to take from a different night. Water stopped in its motion is so cool!


I began this series of photos documenting my girls’ hop scotch jumps. I wanted to add a little more rainbow color to the images and so while one daughter jumped, I had my other daughter next to me while I waved her skirt in front of my lens. The result was a color leak/flare similar to the effect you get when you shoot with rainbow colored straws. I’m eager to look around my house and see what other materials or close we could wave in front of the lens like this and I encourage you to do the same!


Be ready and be quick when capturing movement!
Sometimes the movement you want to capture is over before you can blink. You need a fast shutter speed and you want to shoot on continuous mode to capture as many milliseconds as you can.

After we had played a few rounds of UNO attack, I knew I wanted to capture the cards flying out of the game for a really fun shot. I wanted to have as many as I could cover the frame, coming at me. I positioned the Uno Attack game towards my camera and was ready to snap in continuous mode with a fast shutter speed. After a few attempts, I had two shots that I loved from various points of the cards flying that I merged together for the final image. If you haven’t done something like that before, it’s fairly easy if your images are really similar in composition and position like mine were here. Simply layer one over the other and use the erase tool to erase the parts of the top image you don’t need, revealing the parts of the bottom image you do want!

We took this shot as my oldest hit submit on his final assignment as a 5th grader/elementary student. With distance learning changing everyone’s definition of normal, we wanted to do a little extra something to mark the end of this milestone for him. Insert my two handy assistants in the back with their homemade confetti, and as soon as he hit submit they let it fly. Just like with the Uno attack shot, I had a fast shutter speed and was shooting in continuous mode to capture as many blips of time as I could. I ended up getting one shot that I loved but was prepared to merge one or more together if I wanted more confetti covering the frame.

My kids were outside on this day playing with hula hoops and bouncy balls and riding their bikes. It was a day full of movement but this was one of my favorite shots! My daughter tossed the ball to me when I wasn’t quite ready. As soon as I saw how the ball came at me through my viewfinder, I knew I wanted to capture it. So of course, I had her do it again. Imagine the look on her face when I told her to throw the ball at my camera! This type of shot could be taken two different ways. You can see that my focus was on her and that the ball is a giant out of focus blur coming at me. I also could have focused on the ball for a slightly different image.

This shot was taken on my Go Pro Hero 5 Black. I shoot only in raw on my Go Pro and if you are familiar with their raw shooting abilities, it isn’t super fast (at least on my older model). The ability to edit your color balance in post processing is much more manageable in my opinion shooting in raw vs. the burst mode. My daughter had just gotten this mermaid fin and I wanted to capture an epic splash shot. I positioned her in the corner of our pool with the light behind her and asked her to flip her fin as hard as she could towards me (that’s the beauty of a Go Pro in the water, you get to have so much messy fun!) It took a few attempts but we captured that pretty fin glistening in the sun with a great splash!

This shot was also taken with my Go Pro (it’s not just for water or underwater around here!). We were on a snorkeling adventure in Puerto Rico and my girls were brave enough to JUMP OFF THE BOAT (holding daddy’s hands of course). I wanted to grab as much of a blank ocean canvas around them as I could, so I held the Go Pro up above them as they jumped. This way, I had very little of the actual boat in the frame and easily cleaned up everything in editing to make it appear that they are flying into the water. Had I continued staying behind them to capture the jump, I would never have created this unique shot. Don’t forget to change your angle and adjust your position!
Use movement to amplify emotions
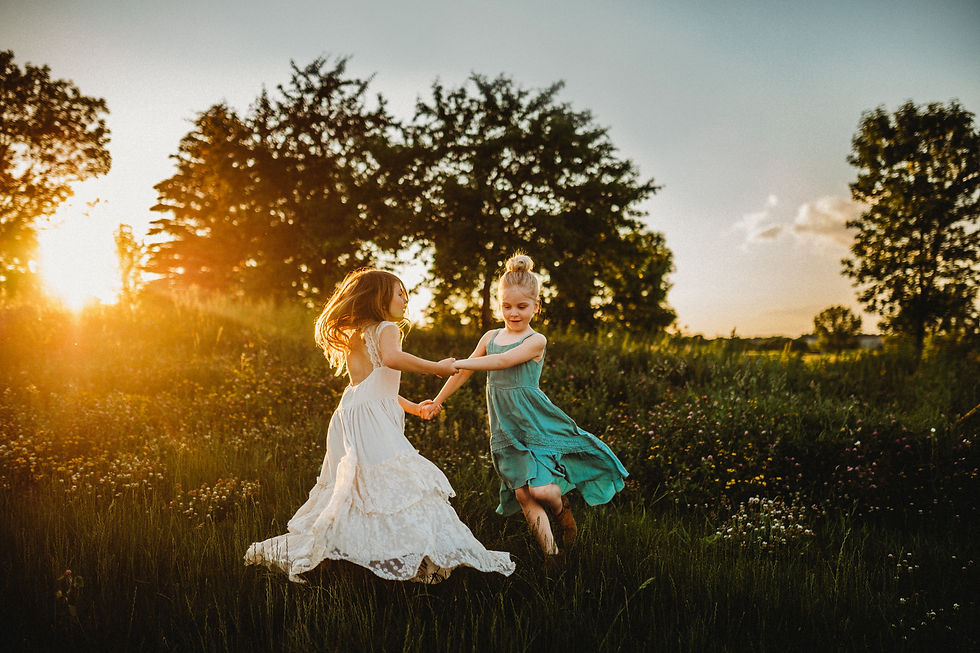
Sometimes one of my girls struggles a bit with the fake smile. My first line of defense for this is to get her to move. I tell her to twirl, they chase each other, play ring around the rosie, swish their skirts/dresses, etc. and almost always, that will elicit the exact genuine smile and real giggles that I’m after. These are simple directions that can work really well in creating adorable, playful images of my two girls.


Use movement to make your viewer feel like they are there
A great movement capture can draw your viewer right in and place them in that exact moment. I love using wide angles for this. Most often I settle on the 24 end of my 24-70 or get my 15mm fish eye lens out. There’s something about the wide shots and distortion of the fish eye that make you feel up close and personal and right there in that moment. The placement, angle and lens choice of this shot of Norah racing towards the ocean makes me feel like I’m right behind her chasing her!


The shot above was also taken with my fish eye. It was the bottom of the 9th, and we needed that one hit to get the walk off win on my son’s birthday. I had a good feeling about this one (or at least I was really hoping and wishing we could pull if off!), so I positioned myself in the row of seats in front of my son, with my finger on the shutter ready to strike and capture every second of his emotions and movement if we pulled through. Clearly, you can see we won that epic game!
Tips and tricks
Overshoot! I often shoot in continuous mode to get as many images as possible, upping my chances for capturing the perfect shot I’m envisioning. If I missed it, we just do it again, and maybe, again!


Check your results and try adjusting something. Try the shot a slightly different way. Have them do whatever it is faster (or slower!), adjust your settings, your angle, your scene, direction, your lens, or all of it! Movement is my favorite thing to play around with and it’s so much more exciting for my kids which makes them much more willing participants for far longer than when I just try to get a standard portrait shot of them.
Are your kids a little younger? Make it a game! How HIGH can you jump? How FAST can you twirl? How FAR can you kick the water? How FAST can you shake your skirt? The best part about playing games is you’ll quite likely get some great giggles along with it!
Brainstorm other objects you can play around with and move for the camera. Or toss in front of the camera, or, for the super adventurous type like me, toss ever so safely towards the camera!
Oh, and finally?? Don’t forget to get in the frame, moving, too!


Comments