Macro by Molly Carstater
- Angie Mahlke

- Aug 14, 2022
- 5 min read
macro love

About me
Hi! I am Molly (https://www.mollycarstater.com); thank you so much for joining my macro lesson. I am a Hello Pro Mentor and a Click Pro. I love macro so much that I wrote an entire class about it! If you are interested in macro beyond the scope of this lesson, please feel free to join my class at Hello Storyteller. https://hellostoryteller.com/product/magic-of-macro-with-molly-carstater/ I live in Virginia with my husband, our two teenagers, and our two year old puppy.
I am primarily a nature and landscape photographer, and I use both digital and film cameras. You can find my work at @mollylovesphotography and @mollylovesfilm on Instagram and @molly on Glass. I have been shooting for 15 years and started shooting macro not long after getting my first camera. Although the images from my early days of shooting macro aren't the best in my portfolio, they set the love for the genre, and I learned a lot about both photography and myself in those beginner years.


Why macro
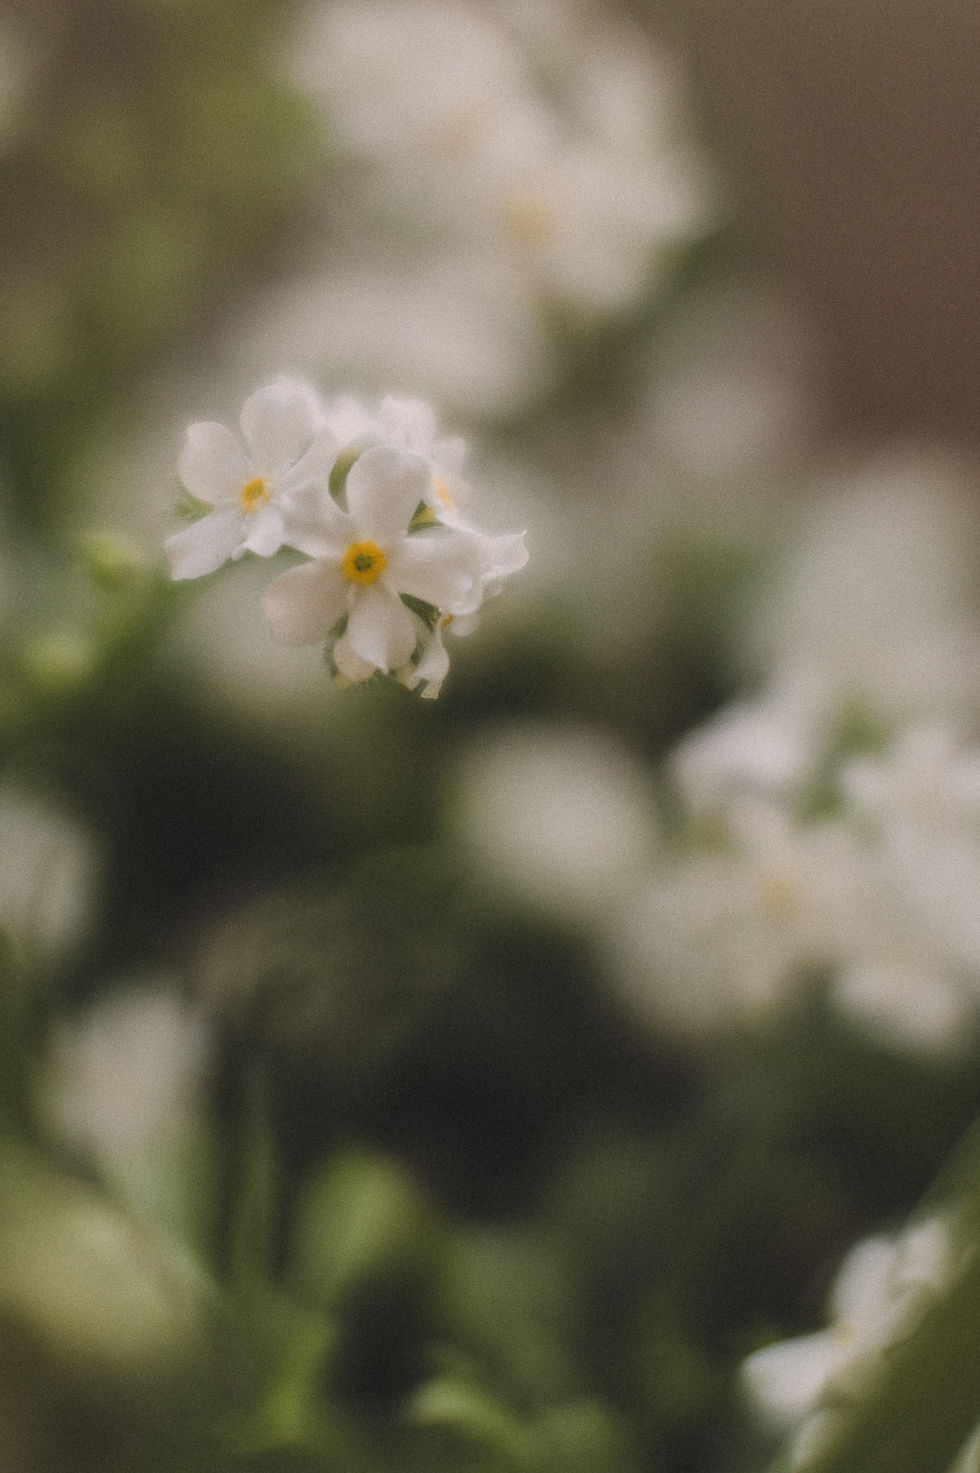
If you are traditionally a portrait or family photographer, you may wonder why you would embark upon macro photography. To be honest, I started macro when my children were very small, and I would sneak outside during their nap time (with a monitor in hand) and find flowers and bark and other nature things to photograph. At the time, it was just a bit of quiet, away from fussy and demanding children, and a way to have just a few minutes to myself of quiet in the outside.
As my children grew (they are both high schoolers now, and my daughter is even looking at colleges), I found myself still in search of the magical quiet that comes over me when I spend a few minutes looking at a flower, studying the petals, hoping to see a buzzing bee or butterfly land down near me. There is so much wonder to be found in the details, and macro shooting allows me to find and share those details.


Gear
The best gear is a dedicated macro lens that focuses replicates at a 1:1 ratio. Dedicated macro lenses are typically quite expensive, often priced at $1,000 or more. They make sense if you do a lot of macro work (or if funds are not an issue). My own main macro lens is an F mount Nikon 105mm 2.8 micro lens that I use with an FTZ adapter on my two Z series bodies. I have also used the Canon 100mm 2.8 lens when I used Canon bodies. Both of these lenses shoot at 1:1.
Lensbaby also has a number of lenses that, while not a true macro, allow for very close focusing and come in at a 1:2 ratio, allowing much closer magnification than normal lenses. I use multiple Lensbaby lenses in my work for macro.


If you are still hesitant to make the leap with a lens, I would suggest extension tubes; you can often find these for as little as $40, and they will reduce the minimum focusing distance of whatever lens you are using. These are amazing when paired with a basic 50mm lens. Because extension tubes have no glass, there is no reduction in optical quality of your lens, although you will no longer be able to focus at longer distances when using tubes.
The other alternative is a filter of some sort to mount to the front of your lens. Lensbaby makes a series that can be mounted to many of their lenses as a screw on filter, and there are others that are snap on from different brands. Although I have both the Lensbaby ones and one from Raynox, be aware that these can reduce optical quality as they are extra layers of glass in front of your lens and must be kept clean to minimize image degradation. I find tubes easiest to work with outside of a dedicated lens, and they are typically less expensive than front of lens filters.

Focusing
Traditional, old school macro would have you use a tripod and perhaps some artificial lighting to capture macro images. My approach is generally much more organic, particularly in the nice weather when I am shooting outdoors. In the summer, I am out in the garden, or on my patio photographing flowers in planters, and even with a tripod, the slightest hint of a breeze will throw off focus. I prefer to steady myself on a knee and shoot with my elbows tight to my sides, a "locked body" approach, hold my breath, and rock back and forth ever so slightly, following the movements of my subject. Using this locked body method also allows me to follow insects as they skitter about.
In the colder, bleaker months, I do often set up with a tripod by a window. This allows me to shoot longer into the days, which of course lose light earlier, by increasing my ISO and decreasing my shutter speed and still maintain focus. When shooting this way, I often focus in reverse...instead of moving the camera (and me), I move the subject, typically flowers in a vase back and forth to the camera lens, using live view to track focus. I find this way allows me to achieve a greater level of detail than I am often able to get when shooting off tripod.


Focusing tips
The number one take away for macro focusing is this: switch your lens to manual focus. Yes, I hear you now, "Manual focus is hard! All my images will be out of focus!" At first, they might be, but with practice, you will get better. Remember, use a locked body position, hold your breath, and gently move back and forth. With macro I often overshoot during this back and forth motion, and that's okay! This is different from the "spray and pray" method of beginning photographers who overshoot by as many as 5 times and hoping one is in focus. Your movements will be deliberate and slow, and likely you will only need 2-3 images to find your perfectly focused image. If you don't get it, just relax and try again.
The next thing to consider is to let your camera do the work. If you are lucky enough to have a modern camera body, you will likely have focus peaking built in. Almost all mirrorless cameras have this available, as well as a few dSLRs. Focus peaking will change your EVF or camera back to show an area (or several) overlayed with a solid color that is high contrast; this is typically your area of focus, and it can be a godsend when shooting manual focus. Check the manual for your individual camera model, as each brand and model has different menu settings to make the most of focus peaking. Also use the zoom function for live view or your EVF to really see where the focus is!


Make sure to use a narrower aperture than you might use for portraits. Macro work has a very slim depth of field, and even at f/8 you can have a wonderful blur pattern away from your focal point. As you get better at nailing focus, you can open up for even more blur, but I recommend stopping down to f/5.6 as you begin shooting macro.
Lastly, make sure when you are shooting macro to get in as close as possible. Set your lens to the minimum focusing distance, switch to manual focus, and get in close. You will be amazed by the tiny details you can see.


Macro work takes a lot of patience but is such a rewarding genre. Don't worry if your first attempts are not as good as your normal photography. I promise it gets easier the more you do it, and even if it takes awhile, you still get to enjoy time in nature and gives you a great excuse to buy yourself some flowers!
And again, if you would like more in depth information on how I shoot macro, with a 65 page pdf and eight videos (a mix of behind the scenes, editing, and one walkthrough of my gear), please check out my full macro class. https://hellostoryteller.com/product/magic-of-macro-with-molly-carstater/


Greetings San Diego: Padres still searching for following huge complimentary firm move
San Diego Padres NewsPadres lose target Jung Hoo Lee to Giants, bottle Seth Lugo to Royals; Juan Soto talks Yankees extensionPadres whiff on Lee as outfield situation transforms direNL West Notes: Lee, Padres, Soto, Giants, RockiesAs Padres brace for even more Shohei Ohtani matchups https://www.storetbrays.com/collections/adrian-houser-jersey, where do they stand withMLB NewsDodgers in speak to acquire Glasnow, Margot from RaysOhtani trying to woo Yamamoto to DodgersThe best fits for 10 groups that are hungry for pitchingSpring Outbreak! 30-team possibility display to launching in MarchHow do you develop the $700 million man?Is a Belli get-together with Cubs coming to be much more likely?Everything to find out about new Giants star,…