Nature Photography by Tiffany Kelly (Macro)
- Angie Mahlke

- Oct 31, 2021
- 14 min read
About me!
I’m Tiffany! I live in the suburbs of Atlanta GA with my husband of 13 years and my little ones: Abbie and Olivia. I got into macro photography in January of 2012. I was embarking on a project 365 and after mere weeks, I was running out of photo ideas. I stumbled across the idea of macro photography and thought it would be perfect. There were endless photo subjects in my backyard on any given day. I got a Leica macro lens for my Panasonic micro 4/3 camera, and never looked back.
I got frustrated trying to learn macro, because everything I read online seemed so “old-school” to me. Everyone said you have to shoot with a tripod and flash. That didn’t fit into my idea of macro photography being relaxing and therapeutic. I set out to teach myself and find my own way, my own style. And here I am, 7 years later, still loving macro with all of my heart.

Why macro?
Macro photography is very close to my heart. It’s something that is just for me, although I do incorporate it into my client sessions. Macro photography can be very therapeutic. It allows you to SLOW DOWN, and to really stop and look at the world around you. I’m a firm believer that gorgeous macro photographs can be made any time of year, with any type of light, in any kind of weather, and therefore it makes for a wonderful personal project or exploration. Another great thing about macro photography is that it’s just you and your subject. You don’t need anyone else to participate or model for you. You can take your time and shoot in solitude and no one is waiting on you or asking you to hurry.

What is Macro?
Macro photography is the close-up photography of subjects that are typically very small.
Gear options
Traditional macro lens - like the Nikon 105mm or Canon 100mm
Lensbaby - the velvet 56 is my FAVE macro lens
Extension tubes - great affordable option to purchasing a new lens
Filters are an option but I prefer tubes
Freelensing - you can reverse freelens to shoot macro with a non-macro lens
Phone lenses
Fun accessories:
Third hand tool - to hold flowers
Water bottle - to make water droplets.

Technical details
Focus
Manual focus is KEY for macro photography. Auto-focus is simply not reliable when we are using very shallow depth of field, and auto-focus will often focus on a slightly different point that we intended. There are many things we can fix in post-processing - such as incorrect white balance or even underexposure. However, we can never fix an image if the focus is off. Another benefit to manual focus is that you aren’t limited with your camera’s focal points. Therefore, you have more freedom with your composition and you can even focus on something very close to the edge of your frame.
I STRONGLY recommend using manual focus only for macro. It may feel awkward at first, but I assure you that with practice, it will become natural and second-nature to you. The only situation when I think you MAY want to use auto-focus, is when trying to capture macro details of moving children or moving bugs.
One thing that completely changed the ease of manual focus for me is when I stopped trying to turn my focus ring, and instead started moving myself and my camera, closer or farther from my subject, in order to focus. So I get my focus ring/focus distance close to where I want it, and then I move myself and my camera to get the focus just right. I then evaluate the image and determine if I need to change the focus ring to get a different composition or distance, and then repeat as needed.

With practice, this will become automatic and you won’t have to think about it anymore. Fine-tuning your focus by moving yourself slightly is much easier than trying to fine-tune by turning the ring with a camera up to your face. The reality is that you will be moving slightly anyway, without meaning to, and you will get frustrated if your movement and the focus ring movement are basically canceling each other out and making it difficult to nail focus.
Also, for me it’s simply more intuitive to focus this way. I can think of my focal plane as being a set distance in front of me (like a plane of glass), as determined by the focus distance I have set. Thus, it’s easy to understand that as I move forward, my focus distance in front of the camera will also move forward by the same amount.

Settings
Metering
In portraits you probably are accustomed to metering of skin. In macro this option isn’t quite as easy. You can certainly meter off your own hand or a gray card if you like. With newborns, I suggest metering off baby’s skin, like you would for a portrait. I typically find something in my scene that seems about the same darkness as middle gray and use that. Green grass (not in direct sun) is a good option. medium colored flowers often meter well to zero. I also know I can use my dining room wall that is painted a medium taupe. I usually meter, chimp, and then adjust a little as necessary. My goal is to not lose details in my highlights or shadows on my subject. When working with bright or direct light, I always meter for my highlights, to ensure I don’t blow them out.

DoF
Let‘s talk depth-of-field (DOF). DOF is extremely important and operates in a very unique way for macro photography. There are three things, in any type of photography, that affect our DOF.
Depth of field is controlled by three factors:
Aperture (larger aperture/smaller f-stop = smaller DOF)
Focus distance (closer distance = smaller DOF)
Focal length (longer focal length = smaller DOF)

Aperture, focal length, and distance to subject all work together to determine our DOF. In macro photography we are VERY close to our subject, which lends to a smaller DOF . We also are usually using a longer lens, like 100mm or 105mm, for example, which also lends itself to a narrow DOF. Thus, we have to really think about our aperture differently in macro photography, compared to portrait photography. In portrait photography, we may consider f/1.4 to be wide open and we may stop down to f/3.2, for example, to get more DOF. In macro photography, on the other hand, about f/3.5 is usually wide open and we maybe need to stop down to f/11 or even more, depending on our vision for the image. Aperture simply works very differently for macro photography versus portrait photography, and we have to adjust our expectations regarding appropriate aperture accordingly.
When deciding your settings, I want you to feel more creative freedom than you typically do when shooting portraits. With macro, I don’t get tied down with getting my white balance “correct” and instead I allow myself creative freedom to choose the white balance that will best fit my vision or my subject. I use Kelvin to set my white balance temperature, but you could also achieve similar effects by using the preset settings (cloudy, shade, etc.). I often like to shoot on the cooler side, but again it depends on my vision. I shoot in RAW so I can easily adjust white balance further in post-processing. Exposure can be utilized the same way. For example, if I know I want a dark and moody photo I can under-expose my image purposely. If I want a bright and airy photo I can over-expose intentionally.
Stabilize yourself - Really anchor your arms to your body Sit or kneel rather than squatting Anchor against a wall if you can.

Lighting
Macro is one genre where I truly believe there is no such thing as bad light. Rather, it’s important to think critically about our available light and how we can best use it, and then develop our vision for the image accordingly. Alternatively if you have a vision for your image beforehand, you need to seek out the lighting that will help you best achieve that vision.
One thing I love about macro is that I don’t have to wait for golden hour. Even if it’s raining or mid-day, I can capture beautiful images.

You may be surprised to learn that flat light is really one of my favorite lighting types for macro. Indoors, this means I will go near a big window, but keep my subject out of any direct sunlight that might be coming through. Outdoors, I love shooting macro when it‘s cloudy (just watch your settings if the sun is coming in and out from behind clouds - make sure you adjust your exposure accordingly). If it‘s sunny I simply find some shade. I often shoot macro on my deck which is covered and gives great shade.
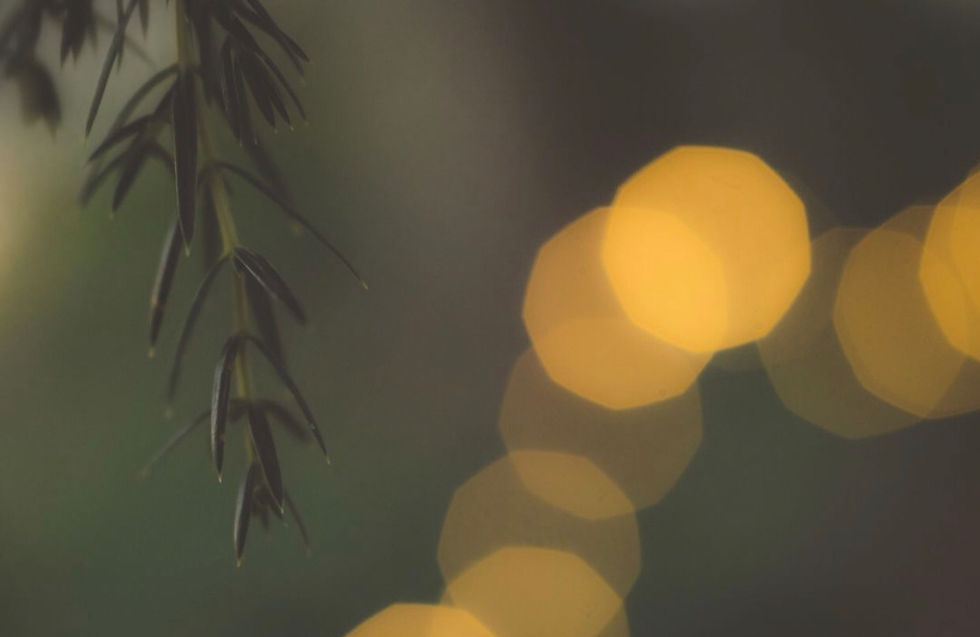
Direct light can be used effectively when done in a purposeful way. I especially like using direct light doors, with sunlight coming in a window. I tend to look for pockets of light. When working with direct light, make sure you expose for your highlights. Try to use the pocket of light to highlight or emphasize your subject or focal point in an interesting way. Direct light can work really well with water droplets or glycerin drops because the light can make them sparkle.
When using front light, you will have the window behind you, so you have to be careful not to block your own light or cast a shadow on your subject unintentionally. I tend to prefer side light, as it brings in some soft shadows to add dimension to my subject. Flat light tends to reduce shadows, while side light emphasizes texture. Remember side light does not necessarily have to be 90 degrees. Angling your subject at 45 degrees to your window is also a good option. You can get nice light on your focal point and still achieve pretty shadows and depth.

With backlighting, you will shoot towards your window or light source, with your subject between yourself and your light. Remember to think about your angle. The light doesn’t have to be directly behind your subject. It could also be behind and above your subject for a pretty effect. You don’t have to wait for golden hour - you can achieve this look any time of day.
Artificial lighting
Occasionally I use a macro ring light or a generic version of the ice light, if I want to use artificial light. The ring light is especially great for jewelry (like at weddings) because it adds a nice sparkle.
For artificial light, you have a ton of options for macro photography, and many of them are very affordable. You can use a variety of types of LED lights (ice light or an off-brand version like mine), a macro ring light, a speedlight or close-up speedlight system, a continuous light, a flashlight, a video light, etc. You can also try a lamp or any other artificial light you have around. I like using my generic ice light because I can move it around and control the placement of my light. It has multiple brightness settings and it gets pretty bright at the highest setting. I always try moving it around to different positions to get a variety of images with different lighting scenarios.
You can use artificial light as your primary light source, or you can use it as a fill light to add more light in a natural light scenario.
Outdoors you can shoot macro in the shade, in direct sun (you can choose to diffuse or even block the light with your own body, or not), or use backlighting at golden hour. Be aware of the wind when shooting macro outside. You will need to bump up your shutter speed to account for movement from the wind. I suggest shooting inside if it’s super windy, if you can.
One of my favorite lighting scenarios for macro is to use shade outdoors. I then make sure that my background is in the shade as well, as I’m not in love with the appearance of blown out grass or ground as a background. I often shoot macro outside on my deck, which has a canopy. Cloudy days are also wonderful for shooting macro, because you will have nice, even, bright light. Be careful if the sun is coming in and out from the clouds - you will need to check and change your exposure as the sun changes.
Think about harsh light versus soft/diffused light. Outdoors, if you like to shoot things where they naturally are (planted, for example) you can get a small 12” diffuser in case your subjects are in harsh, direct light. Sometimes I am able to block the direct sun with my body - it just depends on the time of day and direction of the sun in relation to my subject. If you use direct, harsh sunlight, just make sure your lighting looks intentional and do not blow out any areas of your subject. You can meter for your highlights to make sure you don’t lose information in your highlights.
Shooting at golden hour can also result in beautiful macro photos. I tend to backlight with this lighting scenario and I back up a little more (like 1:2) to ensure I include the pretty light in my image.
Lighting review
What’s your story? What’s the mood you’re going for? Bright and airy or dark and moody? Choose the best light to fit your subject. If something is not working for you, try another kind of light.
When shooting flowers, you really have to think about your subject, its shape and how the light will hit it. For example, daisies have longer petals, and they go “up” from the center. Thus, it’s great to have the light coming from above (it can still be from the front, side, or back). Sometimes I shoot on my table, sometimes I am on my kids short table, sometimes on the floor. Play around with different things. Over time, you will intuitively know how to set up your light in relation to your subject.
Composition
I use the crop overlays in Lightroom often when cropping my images. Once you are in the crop tool (press “r”), you can press the letter “o” to cycle through the various crop overlays. To rotate an overlay, press shift + o. Photoshop CC has the same overlays (also shortcut “0” once you are in the crop tool). Options: grid, thirds, diagonal, triangle, golden ratio, golden spiral, aspect ratios.
Angles are key. This is why I don’t use a tripod. I always try several different angles.
A lot of macro composition is trial and error. Try different angles and different focus distances. Try shooting the same subject from all different angles. Try focusing on a different part of your subject. Sometimes I think I get a great photo, and then when I get it on my computer it falls flat. Maybe the background is distracting or I notice something I couldn’t see on my LCD screen. Shooting a variety allows me to ensure I end up with at least one photo I love.
You will learn to be able to look with your eyes and decide on your composition. You need to decide not only your focus distance, angle (and therefore background), and how you position your elements in your frame, but also where you want to focus and how deep or shallow you want your DOF to be.

Where to focus
You have to think carefully about WHERE you want to focus. Look with your eyes. What is interesting here? Also when out in nature I always look for points of contrast. Like an orange leaf on green grass, a blue berry in a green fern, a white feather in a web, etc. Are there any idiosyncrasies of your subject? Maybe a different color leaf or petal, a petal slightly out of place or going in a different direction from the rest, or a gentle curve in an area of straight lines. Is there anything unique you can capture? This will give something interesting for your viewer to focus on.
Other general rules to consider - what is the biggest element in your frame? What part is closest to your camera? What part is the brightest? When in doubt, if I am feeling bored with my subject or I’m not sure where to focus, I simply spray it with water! Then I can find a nice big on interesting drop to focus on.
The importance of background and angle and cropping in post
The background can completely change your image. Think about your background in terms of its brightness, color, and blurriness. Your background can add to your story. Ways to change your background: move your subject, move yourself, change your depth of field, or actually place a background. A “background” can be almost anything you can think of - a piece of paper/poster/ wood/fabric, a window or wall, grass/ground/trees, cement, other flowers, even a person. I often look around for colors that would make a good background, and then place my subject and angle myself accordingly.
Avoid distractions! Sometimes with macro, your background can be just as important as your subject. Check all edges of the frame - do this while shooting and again in post-processing. Make sure everything included in your frame is intentional.
Sometimes what is out of focus is just as important as what’s in focus. Try to notice all the elements in your frame and determine if you should change your composition or angle to exclude or include anything.

Background color
The color of the background is very important to me. When planning my background, I keep in mind that I can alter the colors in Lightroom pretty easily. For example, if I want a blue background and I don’t have anything blue handy, I will use my white wainscoting (for example) and just cool my white balance to make it appear blue. I can then emphasize that blue even more in Lightroom. My images with colored backgrounds are often just ordinary colored things (beige walls, espresso table, brown floors, etc.) that I have altered in Lightroom.
Composition tips & tricks
What are you drawn to? Curves? Straight lines? What colors? For me, I know I love very shallow depth and a very clean background. I also love bright colors or dark and moody images. Over time, you will develop your own voice, style, and vision for macro photography. It comes with practice, and also analyzing your own work.
Lines, form, and shapes are all important elements of composition when working with macro. This is why I strongly suggest moving around and trying different angles. Pay attention to the lines and shapes in your frame and how they change as you try different angles.
What textures can you find that are interesting? Can you enhance these by changing your composition or angle? What interesting shapes do you see? Can you emphasize them with your angle or compositional choices?
Try different things! Take one subject and try centered, try different points on the rule-of-thirds grid, etc.
Composition is all about leading your viewer’s eye, and in macro photography it is often about making sure our viewer focuses where we intended. Make sure your focal point looks intentional. When you look at your frame, where does your eye go? Pay attention to depth - meaning which elements are closest to you or furthest away?
Don’t crop just the tip/edge of your subject. This makes your composition look unintentional. Think about what is and is not in focus in your frame. How can you crop effectively, based on that? I love using creative crops and negative space to really emphasize my subject.

Mood & Color
Think about the mood you want your image to evoke. What colors would help you best achieve that?
You can also work backwards with this process. What mood is a natural fit for your subject? How can you emphasize that mood?
A few examples: romantic: pink, rose, lilac. tranquil: blue, aqua, lavender, light gray. whimsical: bright blue, yellow, orange, bright pink. exciting: red, orange, bright pink.

Bringing it all together
Choices to consider… What can you change? Your aperture, background, focal point, focal distance, composition, angle, landscape/portrait orientation, lighting, exposure, editing, lens...
Uses for macro
Therapy
Artistic development
Artwork to sell Gallery shows
Let’s talk about the broader scope - they WHY for macro.
Macro makes for an awesome personal project - a way to shoot for yourself. As an example, I used to have a “macro monday” feature on my blog. I did this project for over two years and have hundreds of volumes posted. If you’re interested in continuing with macro, I challenge you to brainstorm ideas for creative projects to keep you going! This could be sharing weekly, or shooting/sharing every day for a month, or following certain prompts, or doing a color project... the possibilities are endless!
I have had many people tell me that learning macro photography has strengthened their other work as well. For example, it teaches you to really slow down and think about your composition.
I encourage you to PRINT all the gorgeous art you are creating! The possibilities are literally endless for creating physical goodies with your art. Here are a few of my favorites:
Photographic prints - deep matte paper from color inc
Press prints
Metal prints
Acrylic blocks
Wall or desk calendars
Greeting cards or note cards - pinhole press
Mouse pads, wood prints, gifts for friends and family, etc.

Conclusions
What’s your story? What’s your vision for your image?
Look for “personality” in your subject. What makes it unique?
Your lighting and background should flatter and compliment your subject.
Shoot a variety.
Simplify your photo and your frame.
Develop your own style. It will be different from my style - that’s a GOOD thing.
Embrace the learning curve. Macro is not an easy genre, and it really does take continued practice.
Contact me anytime: tiffanykellyphoto@gmail.com and @tkelly912 on Instagram.


Comments